Recently I needed to add a few new features to the client’s web page written in Gatsby JS. The first feature was to offer the product for the user when he enters the web page and if he is interested, ask him to fill a two-field form to get the product in the e-mail. The second feature was saving that info in the Google Sheets on the Drive using the Google Sheets API.
As the web page is just a simple static page with no backend and simple cms, hosted on the Netlify, I opted for the Netlify functions. Netlify functions are basically serverless Lambda functions which means they run on demand, and running a dedicated server is not required. All the bits and pieces can be found on the Netlify Functions website, but the important context is that under the hood they use AWS Lambda.
TL;DR
I’ll show you how I used Netlify functions to:
- send an e-mail after the form is submitted
- communicate with the Google Sheets to update the data.
Given you opened this article because you are interested in the technologies mentioned above – I advise you to read on!
Netlify Functions
First of all, to be able to use serverless functions by Netlify, we need to do the following:
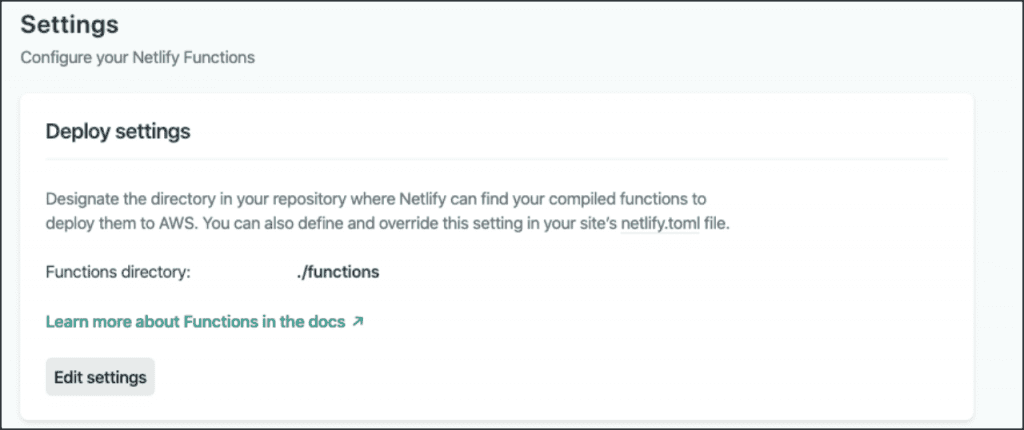
- Create and then define directory which holds functions (I did it at the root level, you can do it elsewhere it’s up to you) on the Netlify dashboard under the ‘Functions’ section in the navigation bar:
- After setting up, you can start implementing the functions in Javascript using Node JS syntax.
Every function exports the handler method with event, context and callback parameters:
- event – request details
- context – user information
- callback – function which is called to return error or response object
To be able to test the functions while developing them I find it easiest to use Netlify dev CLI. It allows us to manually invoke the functions, test them and logging in the console, just by starting the dev environment using netlify dev or ntl dev command.
Let’s start with the actual implementation with the first feature.
Feature 1: Sending an email
Since the client already had an account on Sendgrid, I used the Sendgrid API to send the email via @sendgrid/mail – the official package for node from Sendgrid. In order to use this package we need to obtain Sendgrid API key. You can check the guide on the official website.
After preparation is done let’s take a look at the actual function :
const sgMail = require('@sendgrid/mail')
    const fs = require('fs')
    const { GATSBY_SENDGRID_API_KEY } = process.env

    const toBase_64 = file => {
      const bitmap = fs.readFileSync(file)
      return new Buffer(bitmap).toString('base64')
    }


    exports.handler = async (event, context, callback) => {
      const {body} = JSON.parse(event)

      const file = require.resolve('./sample.pdf')
      const pdf = toBase_64(file)

      //define pdf email content and sender
      const msg = {
        to: payload.email,
        from: 'send@email.com',
        subject: 'Email title',
        html: `
        <p>Email body</p>

        `,
         attachments: [
           {
             filename: `some pdf file`,
             content: pdf,
             type: 'application/pdf',
             disposition: 'attachment',
           },
        ],
      }

      try {
        sgMail.setApiKey(GATSBY_SENDGRID_API_KEY)
        await sgMail.send(msg)

        return {
          statusCode: 200,
          body: 'Message sent',
        }
      } catch (e) {
        return {
          statusCode: e.code,
          body: e.message,
        }
      }
    }
The important thing to notice is the environment variable which holds the Sendgrid API key:
const { GATSBY_SENDGRID_API_KEY } = process.env
You can save the GATSBY_SENDGRID_API_KEY in the .env file but when you deploy the site it needs to be added to the Netlify as well in the Deploy Settings→Build & Deploy→Environment section.
Next, we define the email body which holds recipient email (which we got from the event object), sender email, subject, the email body written in HTML and optionally attachment which I used to send some .pdf file. After everything is defined we invoke the sgMail method with the corresponding API key and whether that resolves successfully or not – return appropriate status code and body.
The last thing to do to make use of the function we just created is to invoke it somehow:
const triggerFunction = async e => {
    e.preventDefault()
    try {
      const response = await fetch('.netlify/functions/sendPdf', {
        method: 'POST',
        body: JSON.stringify({mail_to: 'mail@me.com'),
      })
    } catch (error) {
      console.error(error)
    }
Simple as that, we’ve implemented the sending email feature just by using awesome functions provided by the Netlify.
Feature 2: Interacting with the Google Sheets
As mentioned in the intro, the second feature was to save some data in the Goole Sheet provided by the client using Google Sheets API. Again, the Netlify function is going to be used to trigger the sheet update. (You can do this without the function itself but I find it easier and more robust to do it this way).
Prerequisites:
- Create a new Google Sheets document
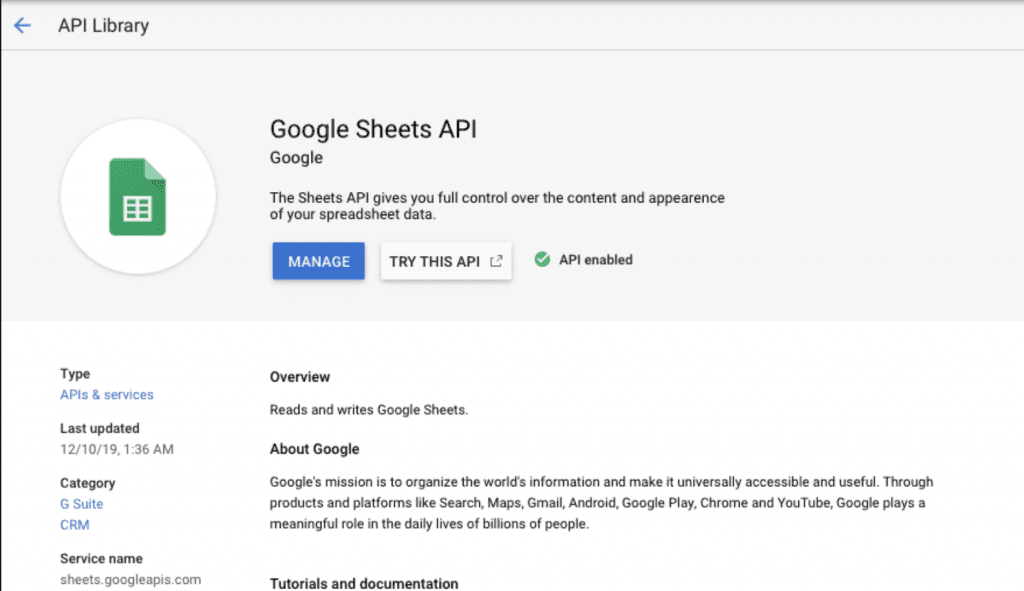
- Create Google Service Account in the developer console and enable Sheets API from the Library:
- Go to Library, find the Sheets API and click Enable:
- Get the service account key by going to Create credentials → Google Service Account and exporting the JSON file with the service account credentials
To interact with the Google Sheets API I used google-spreadsheet package from npm.
const { GoogleSpreadsheet } = require('google-spreadsheet')

    exports.handler = async (event, context, callback) => {
      try {
        const doc = new GoogleSpreadsheet('some_google_document_id')
        await doc.useServiceAccountAuth(require('./your-service-account.json'))
        await doc.loadInfo()
        const sheet = doc.sheetsByIndex[0]


        const data =JSON.parse(event.body)
        const addedRow = await sheet.addRow(data)


        return {
          statusCode: 200,
          body: JSON.stringify({
            message: `row added`,
          }),
        }
      } catch (e) {
        return {
          statusCode: 500,
          body: e.toString(),
        }
      }
    }
The first thing to do is to get the document we are going to read or update. Id of the google document you can find in the document URL:

After that, some kind of authentication needs to be provided. I find it easiest to just download the Google Service Account credentials in the .json format and add it to the project and import it in the function.
The JSON file structure should look something like this (populated with your project values of course) :
{
  "type": "service_account",
  "project_id": "my_project",
  "private_key_id": "some_long_key_id",
  "private_key": "-----BEGIN PRIVATE KEY-----\\some long private key",
  "client_email": "myproject@myproject.iam.gserviceaccount.com",
  "client_id": "1231231231231231",
  "auth_uri": "<https://accounts.google.com/o/oauth2/auth>",
  "token_uri": "<https://oauth2.googleapis.com/token>",
  "auth_provider_x509_cert_url": "<https://www.googleapis.com/oauth2/v1/certs>",
  "client_x509_cert_url": "client_x509_cert_url": "<https://www.googleapis.com/robot/v1/metadata/>...."
}
After the authentication process is successful we are ready to interact with the stylesheet.
doc.loadInfo() is used to load the stylesheet data into our document instance, and sheetByIndex[0] is selecting the first stylesheet in the document. If you have more than one, you will select the one you need or it even could be done dynamically.
The only part left to do is parse the data from the request body and add it to the stylesheet using the sheet.addRow() method. It automatically adds in the first empty row in the document. The important thing to notice – the keys in the data object the function receives should match column names in the document if we are trying to edit the existing document (eg. if the column names in our document are ‘name‘, ‘email‘ and ‘phone‘ then the object the function receives should have the same keys: {
name: ‘user 1’,
email: ‘user1@gmail.com,
phone: ‘0323339992’
} ).
After we did the work required to save the data to the document, we just have to return the appropriate status code and body if the function resolves successfully or with some kind of error.
The last thing to do is to invoke the function:
const onSubmit = () => {
	fetch('.netlify/functions/writeToSpreadsheet',{
        method: 'POST',
        body: JSON.stringify({name: 'User 1', email: 'user1@gmail.com', phone: '0323339992'})
   })
}
And after the function is successfully invoked we should see the changes in our spreadsheet.
Wrap up
Simple as that, both features mentioned in the intro are implemented. I really like the idea behind Netlify functions (and other serverless functions providers) and the ease of use. What really excites me is the fact you don’t have to run a dedicated server for simple operations such as sending emails. You just create the function which represents the endpoint and invoke it whenever you need it – the best part is, for a reasonable amount of requests it’s totally free.
Thanks for reading, let me know what you think.